Showing posts with label Crafting. Show all posts

Tuesday, February 12, 2013

Birthday Balloon Surprises and C.H.A.N.G.E.S. Coming!


Last month my niece turned FIVE!  To celebrate her birthday, we set to work writing special birthday notes and pictures that we tucked inside tiny balloons.  In honor of her 5 years, we also tucked in 5 one dollar bills.  I had seen a similar idea on pinterest and decided that this would be the perfect way to celebrate her birthday.  The boys were thrilled to put the gift together, popping balloons to retrieve treasures on the other end eagerly carried out.  As a bonus, mailing that big box didn't break the bank.

Knowing how fixated my kids are when they earn or receive dollar bills, I figured that would be the highlight.  When I asked my sister if the money gift was a hit, she told me that my precious niece actually valued the copious amount of rolled up notes and pictures.  She carried them around as 'treasure' for several days.  I just love the hearts of young children...

Oh the joy of planning little surprises.

Speaking of surprises, I'm excited to let you know that big C.H.A.N.G.E.S. are coming to the blog!  As in BIG.  I won't be here in a few weeks.  I'm moving! {to a new blog address}  Similar heart and content, but with a renewed focus and a new home! I'm so excited for the direction the Lord is leading with this and can't wait to bring you all with me for the big moving party!  So be sure to check in, or better yet subscribe via email so you won't miss a thing!

Monday, October 1, 2012

The Birthday Girl!


My precious baby girl turned 1 a few days ago! Oh how the year sped by.  It certainly was not an easy year, but she is such a delight.

She appears to be our second introvert and is very shy.  It has only been in recent weeks when she would willingly go to more people.  Keeping with tradition (here, here, and here), I made our petite little princess a birthday crown.  Greta's name means 'pearl' and so it was only fitting that I incorporate some of those into her crown.  Those of you astute observers probably noticed the return of the gray felt that I used for the boys birthday shark fins...  I overestimated how much I needed and so Greta's crown took shape from some of the surplus.  I'm quite pleased with the result and hope that she soon appreciates the work of art instead of focusing primarily on the forces of gravity! :) 

Food allergies are something new to me.  She is sensitive to so much... 

I've had to refrain from dairy, eggs, oatmeal, Dijon mustard and peanuts.  Her poor system is so sensitive that when she clamored for a few bites of sweet potato two months ago, she ended up with nearly three weeks of green diarrhea.  I've heard that their gut matures with the arrival of teeth and I'm hoping that is true as she should get her first in the next couple of weeks.  

While family still gathered to celebrate, she didn't get to partake of much although I did sneak her a few bites of watermelon!  She loves her family and the beautiful outdoors, so she enjoyed herself despite her lack of table food.

This beautiful daughter of ours has reminded us of the need to pray and keep praying.  I've learned compassion as I have a new perspective towards families with food allergies and she has helped me gain the ability and confidence to cook around food allergies/intolerance's that has come in handy as I've had opportunity to entertain families experiencing challenges even greater than these.

Happy Birthday sweet Greta.  I look forward to the years to come!
Related Post:
Greta: A Birth Story

Friday, August 31, 2012

Kindle Crafting...

There is something about birthdays {and Christmas too} that bring out the crafty side for me.  The older my kids get however, I'm finding less and less time for those pursuits.

My dad brought up wanting a bag to carry his kindle in while he walks and listens to his books.  This seemed to be a doable project!

Little did I know just how doable it could be!  I wanted a messenger-bag look since that seemed more 'manly.'  As I looked through the fabric I had on hand, I discovered these pants that Keegan had busted through at the knee.  I had them in my pile to patch.  Instead, I decided to use the leg for the body of the kindle pocket.  The size was perfect.  I merely cut off the bottom, hemmed it and then proceeded to cut the rest of the pants into strips to make straps!  Viola - a manly kindle carrying bag.  I simply stamped a little message to the outside of the bag and we were set!

I love the creative process and it is so fun to watch the boys blossom in their creative pursuits. The creative spirit thrives in community and I find that each of us in our own way grow in this area as we observe each other pursuing our own way to express this! 

He liked his bag and with my creative juices satisfied for the time being, I dove back into the realm of child-rearing, reading and learning...   My only problem is that now the boys want bags!  hmmm, maybe Christmas?

Friday, May 4, 2012

Handmade Tradition, Passed On


I am slightly obsessed with making handmade gifts. There is something so fun about the creative process and then giving the results of your dreaming, planning and creating to someone...

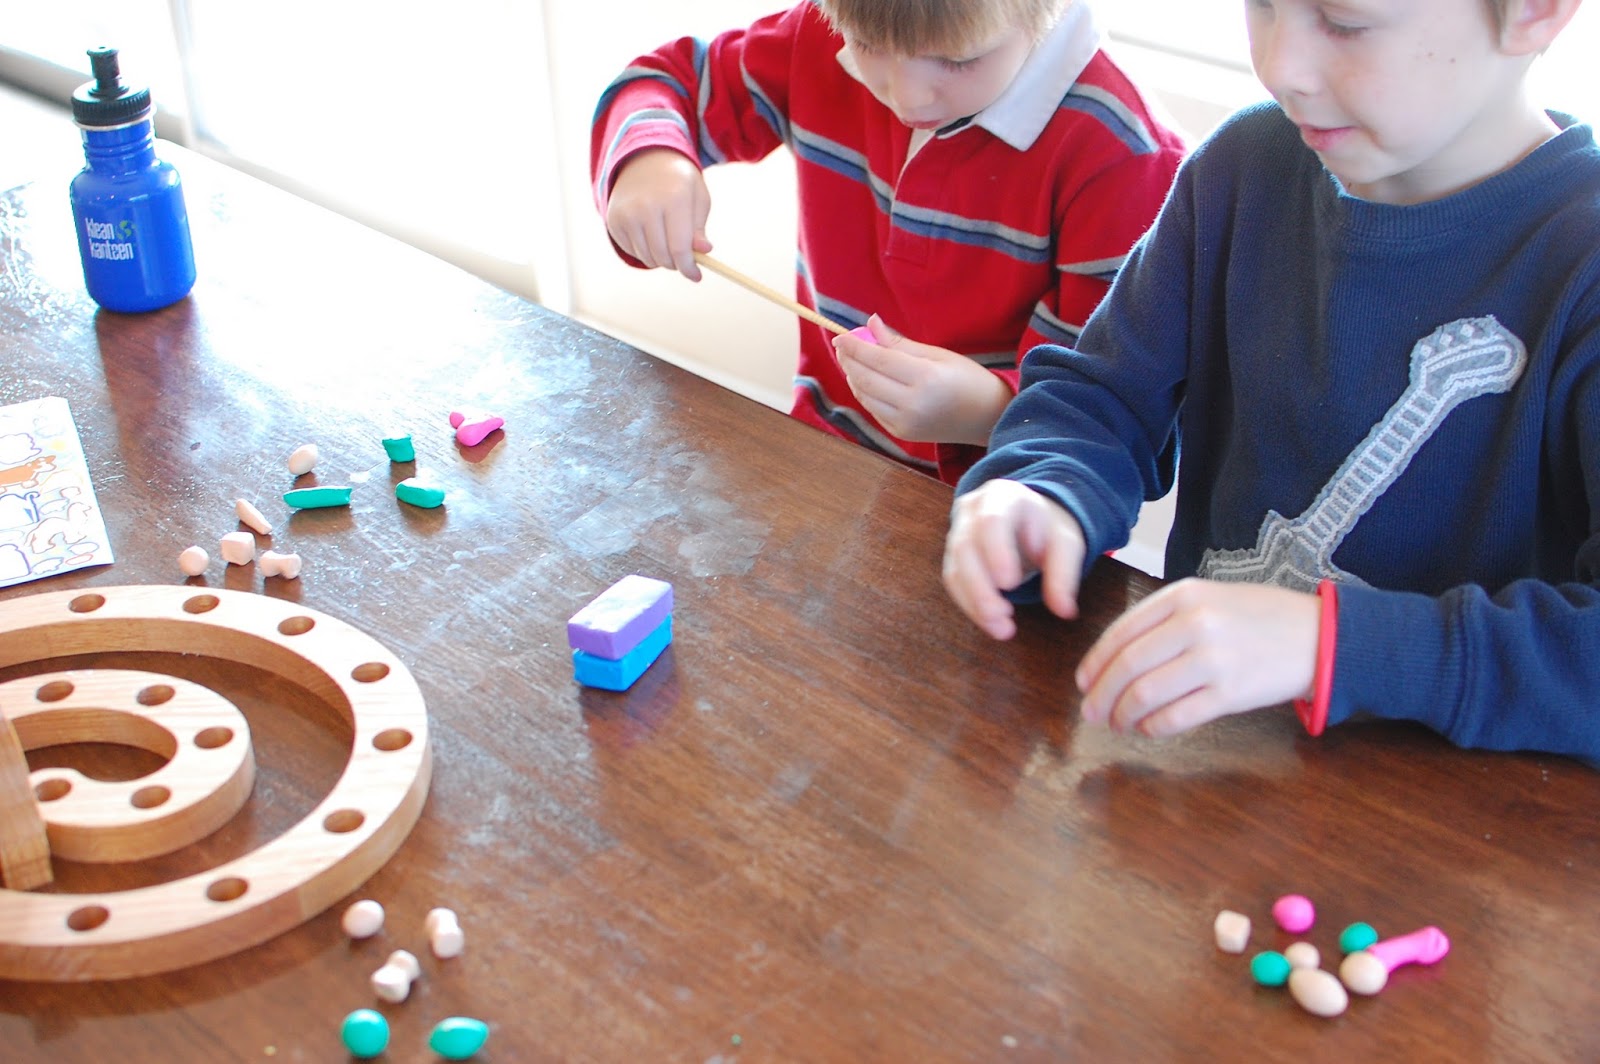
This last Christmas, my boys were excited to join in.  My sister had sent me this link since she knew that Keegan had clay to work with.  We were inspired and the boys set to work wrapping fingers around clay and coaxing it into a variety of different shapes.  I couldn't help myself, but ended up joining them in playing with the pliable clay and forming beautiful beads, poking holes in them with chopsticks and then gently placing on our cookie sheets to bake.

You would have thought a fresh batch of chocolate chip cookies were baking with how eagerly they all sat around the oven...

Afterwards, the boys and I discussed placement of beads and strung them onto twine and then added ribbon.  Their hard work was rewarded by a very excited cousin on Christmas morning...

With those memories in mind, we are gathering ideas and looking forward to getting a jump start on gift-making this summer.

Do you or your children make homemade gifts?

Monday, April 16, 2012

Illustrating the Imagination.


We read.

...a lot.

So it would seem natural that my artist boy, especially, would want to undertake writing and illustrating his own.

Since it is so laborious for him to write at this point, I took his story down from dictation.  After deciphering how many pages we would need, I proceeded to cut and fold some card stock and running it through my sewing machine to 'bind' it together. 

The artist was very pleased with his book that was just waiting to be filled.  We printed his story and turned him loose with scissors, glue stick, colored pencils/markers and his imagination!


As a bonafide 'author/illustrator', he's eager to write some more! 

He completed another book illustrating the animals of Mozambique for a Geography Fair we participated in recently.  I have to admit that I'm quite attached to it and got a tad bit emotional when he wanted to give it to my friend's little girl who so graciously, along with her Nana, let us borrow some items from Mozambique for our display.

Saturday, January 22, 2011

All patched up and ready to take-off!


Anyone remember our patches from last year?  Well, I'm at it again...

This stack of holey jeans has been staring me down to no avail for some time now.   

But then in the course of a week, Keegan - our 4yo, put holes in his last three pairs of pants, leaving him with only a single pair of intact sweat pants.  Somehow, in our rough and tumble home, I'm not surprised.

So I pulled out my trusty machine and set to work breathing new life into this pile of jeans! 
 
For the third year running, I continue to patch them up and run these blue jeans into the ground.  It is the family way...   We use them up until they are fairly useless.

And I continue to score big brownie points with the boys.  Of course, given my desire for aesthetics, I'm totally hooked on my way of patching jeans too.  They are so stinkin' cute and easy to do that I thought I'd pass on my little secret!  So here you go: 
Step 1- Collect your materials.
  • Sturdy fabric for patches.  I prefer neutral corduroy fabric.  Brown and navy blue go with everything.
  • Patch pattern.  I've free handed most of mine, but have also been known to search google images for simple designs that might work.  You can download some of my favorites here or continent shapes here.  (Keegan recently requested an Africa patch and I was quite pleased with how it turned out.)
  • sewing scissors
  • pencil for tracing.
  • Fabric glue - an essential in my house!!!  (hahaha, it is one of my favorite sewing notions!)
  • Sewing machine and thread that matches patch fabric.
Step 2 - Prewash/dry and iron fabric.

Step 3 - Choose a design and trace outline on to back of corduroy fabric - taking care that the image will look correct when looking at the other side of fabric.
Step 4 - Reinforce edge of hole with stitches.
Step 5 - Add glue all over patch. I use a straight pin to smear mine around.  This is a step that even a child could help with!  Place a piece of paper in between the pant leg layers so the glue doesn't go through the jean to the other side.  Allow to dry.
Step 6 - Use a zigzag stitch to reinforce edges of the patch.  Be sure not to sew through to the other side of the jean...
Step 7 - Admire your work before your kids swoop in and 'take off' with their new pants!


I'm always looking for fresh ideas.  I'm all ears if any of you have ideas on other patch patterns!

Sunday, December 12, 2010

Painting Joy


Joy to the World...

...the Lord is come.
We've been learning Christmas carols this month.  There is so much rich truth tucked away in those familiar songs.  And with all of our world geography explorations over the last several months, it only seemed appropriate to put this easy craft together!

You can really use any kind of paint medium - water colors, tempera paint, finger paints, etc...
I traced circles and then set them to painting.   Actually, I made enough so that I could join in the fun too!
This was a great exercise in self-control for the youngest especially to only pick ONE color to paint with when faced with such appealing choices.  When we finished this step, we all just enjoyed painting with ALL the colors on fresh paper!
Due to sickness this last week, we divided this project up into two days.  The following day while sick boy was napping, the two olders set to work cutting land masses out of green tissue paper and gluing them down.

 We got a little excited about the glue use over here...

But eventually, we were able to attach everything together with twine and hang up our new ornaments!

Monday, November 15, 2010

Mayflower Nut - a tutorial

I'll be the first to admit that we are a little nutty over here!  But that's just how we roll...

In preparation and anticipation of the upcoming Thanksgiving holiday, I always love to review a little history.  We've pulled a few of our favorite Thanksgiving books together and I couldn't help squeezing in a few fun projects before we leave to visit family.

So here's our homemade miniature Mayflower ships and a quick tutorial so you all can make this super easy craft too!

 Here's a quick inventory of what you will need for this project:
  • playdough (we used our favorite recipe and I added cinnamon, cloves and nutmeg to capture that scrumptious 'fall' smell.)  Clay would probably work better, but I don't keep any of that around.
  • walnuts (I bought three in case I ruined any of them.  I knew I needed at least three 'good' boats.)
  • toothpicks
  • paper
  • pencil and scissors not pictured, but needed to draw and cut out sails
FIRST: Using a butter knife, carefully separate the walnut into two halves.  In hindsight, I wish I had bought a couple of extra walnuts.  I think the boys would have enjoyed trying to do this.  Since I was afraid of ruining all of them, I did this step.  Gut the walnut shell halves and have a snack!

SECOND: Trace three rectancles (with sides angled inward) in graduated sizes.  Cut them out.  Depending on the age of the child this can be a you job, a them job or both (and then let them pick what set of sails they want to use.
 THIRD: Let them place a line of glue down the center of each sail and place toothpick with at least two centimeters of space at the bottom of the toothpick blank.
FOURTH: Allow to dry.  Go play with the playdough! Pinch off small bits of playdough to stick inside the walnut shells.
FIFTH: Place your sails and embark!

Up Next: Playful learning with our new Mayflower ships!


Want to receive updates via email or in an RSS feed?
I love being able to connect with you all via facebook as well.